DIY vs. Professional Smart Film Installation: Cost & Guide
Introduction: Should You Install Smart Film Yourself or Hire a Professional?
Smart film is an innovative window solution that allows glass to switch between transparent and private states using electrical power. Commonly based on Polymer Dispersed Liquid Crystal (PDLC) technology, smart film can provide on-demand privacy for bathrooms, bedrooms, home offices, glass partitions, and other residential spaces.
For homeowners, one of the most important decisions is whether to install smart film independently or hire a professional installer. DIY installation may reduce labour costs for suitable self-adhesive products, but it requires careful surface preparation, precise film handling, and correct electrical connections. Professional installation typically offers greater support for complex windows, large glass panels, and integrated control systems.
The total smart film installation cost depends on the film type, glass dimensions, electrical requirements, installation complexity, and local labour rates. Understanding the installation process and its limitations can help homeowners choose the most practical approach.
1. What Is Smart Film and How Does It Work?
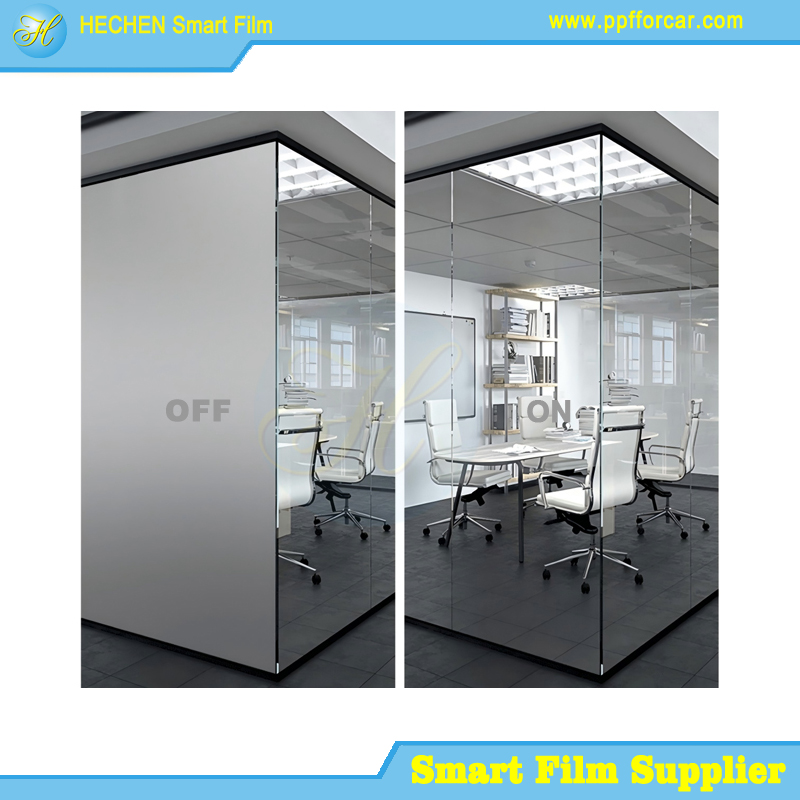
Smart film is an electrically switchable film that changes its optical appearance when power is applied. PDLC smart film is one of the most common technologies used for residential privacy applications.
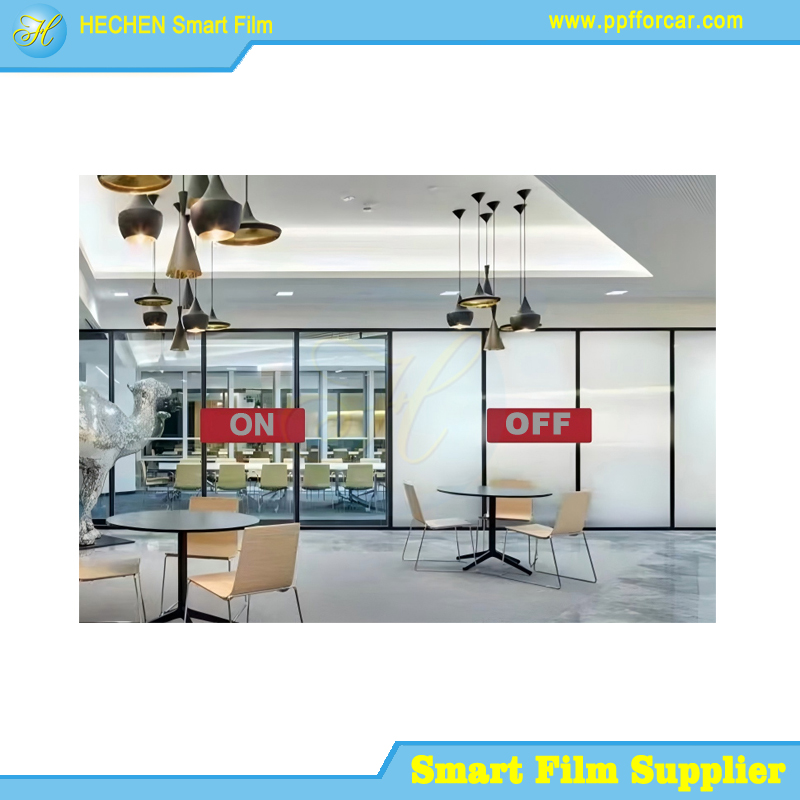
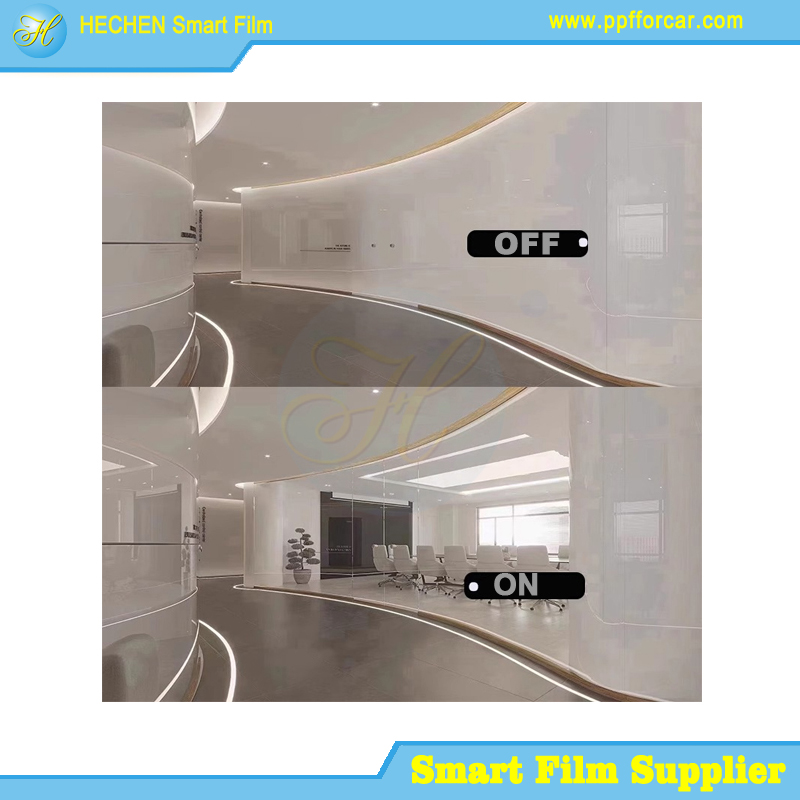
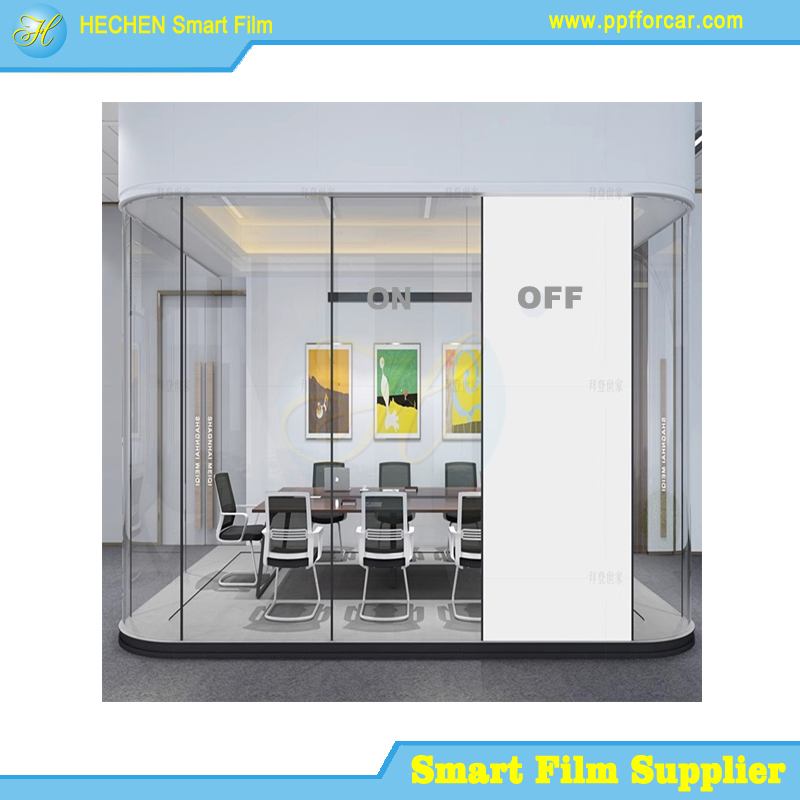
When the film is powered, its liquid crystal structure aligns to allow more light to pass through, creating a transparent or translucent appearance depending on the product. When power is removed, the liquid crystals become randomly oriented, scattering light and creating a frosted privacy effect.
The film is typically connected to a compatible transformer or power supply and may be controlled using a wall switch, remote control, touch panel, or smart-home interface.
Smart film is often installed on existing glass, making it an alternative to replacing conventional windows with newly manufactured switchable smart glass. However, not every smart film is suitable for direct installation by homeowners.
Two common product categories are:
Self-adhesive smart film: Designed for retrofit applications on compatible existing glass. It may be suitable for DIY installation when the manufacturer explicitly provides installation instructions for that purpose.
Laminated smart glass or non-self-adhesive PDLC film: Often requires specialist glass fabrication, lamination, or controlled installation procedures. It should not be treated as equivalent to a standard peel-and-stick product.
Before purchasing, confirm the product construction, glass compatibility, electrical requirements, and installation method with the supplier.
2. DIY vs. Professional Smart Film Installation: Key Differences
The best installation method depends on the homeowner's experience, window configuration, and tolerance for installation risk.
| Factor | DIY Installation | Professional Installation |
|---|---|---|
| Initial labour cost | Lower if installation is successful | Higher due to labour charges |
| Technical skill | Requires careful measuring and handling | Provided by experienced installers |
| Surface preparation | Managed by the homeowner | Usually included in the installation process |
| Film alignment | Depends on installer experience | Typically more consistent with experienced handling |
| Electrical connections | Must follow approved product instructions and safety requirements | Can include qualified electrical installation |
| Large or complex windows | More difficult to handle accurately | Better suited to specialist installation |
| Risk of installation defects | Higher for inexperienced users | Can be reduced through experience and quality control |
| Warranty considerations | Depends on manufacturer conditions | Depends on manufacturer and installer terms |
DIY installation can be practical for a small, flat, easily accessible window when the product is explicitly designed for self-installation.
Professional installation is generally preferable for large glass panels, multiple windows, curved or unusually shaped glass, difficult cable routing, and installations involving integrated home automation.
3. How to Install Smart Film on Home Windows: Step-by-Step Guide
The following process describes a typical retrofit installation using self-adhesive PDLC smart film. Always follow the instructions supplied with the exact product because adhesive systems, surface preparation, busbar arrangements, and electrical connections vary.
Step 1: Measure the Window and Confirm Compatibility
Measure the visible glass area carefully, recording the width and height at multiple points. Check whether the glass is flat, accessible, and compatible with the film's adhesive system.
Before ordering, confirm:
The dimensions of each glass panel.
Whether the film can be trimmed on-site.
The required edge and busbar clearances.
The location of the transformer and cable exit.
Whether the window frame can accommodate the wiring.
Whether the glass type and existing coatings are compatible.
Do not assume that all smart film can be cut freely after manufacture. Some products have specific electrode positions, busbar arrangements, or factory-cut dimensions.
Practical tip: Prepare a window-by-window measurement sheet and confirm the final cutting dimensions with the supplier before installation.
Step 2: Prepare the Glass Surface
Surface preparation is one of the most important factors in achieving a clean finish.
Remove dust, grease, fingerprints, adhesive residue, and other contaminants using a glass cleaner approved for the film.
Remove loose particles from the surrounding frame and installation area.
Inspect the glass for scratches, chips, cracks, and coating defects.
Allow the glass to dry completely if the product requires dry application.
Keep the installation area clean to reduce the risk of airborne dust settling on the adhesive.
Avoid cleaning products that leave wax, silicone, oil, or other residues. These substances can interfere with adhesion.
The glass should also be within the temperature and environmental limits specified by the manufacturer. Installing film in unsuitable conditions can affect adhesive performance and the quality of the finished surface.
Step 3: Choose the Correct Application Method
Self-adhesive smart film is not always installed using the same technique. Some products require dry application, while others use a specified wet-application process.
Dry application
In a dry installation, the protective liner is removed progressively and the adhesive film is applied directly to the prepared glass. The installer aligns the film carefully and smooths it using the recommended tool.
Dry application avoids introducing liquid beneath the film, but dust control and alignment are especially important because repositioning may be difficult once the adhesive contacts the glass.
Wet application
Some films are designed for wet application using a manufacturer-approved solution. The solution allows temporary positioning and helps the installer work out trapped liquid before the film settles.
However, ordinary wet-installation techniques used for conventional window tint may not be appropriate for every PDLC smart film. Excess liquid can damage electrical components, busbars, exposed edges, or connections if the product is not designed for that method.
Important: Never apply water or installation solution to the adhesive side unless the manufacturer specifically permits it. Do not allow liquid to enter electrical connections.
Step 4: Position and Apply the Film
For a product approved for DIY installation, follow the supplied instructions and work methodically.
Confirm the film orientation and busbar position before removing the protective liner.
Align the film with the intended glass area.
Expose the adhesive gradually rather than removing the entire liner at once.
Apply the film progressively using the recommended squeegee or installation tool.
Work from the appropriate starting edge, following the product-specific technique to minimise trapped air.
Inspect the surface under good lighting and address installation defects only as permitted by the manufacturer.
Avoid excessive stretching, sharp creasing, and unnecessary contact with the adhesive. These can cause permanent defects or damage the film's internal structure.
Large panels are often easier to install with two people because the film must remain aligned while the liner is removed.
Step 5: Inspect the Edges and Electrical Components
After applying the film, inspect the perimeter, electrode area, and cable exit.
Check for:
Trapped dust or visible particles.
Creases, folds, or lifted edges.
Uneven alignment.
Damage to the electrode or busbar.
Cable strain or exposed conductive components.
Do not attempt to repair damaged electrical layers using improvised conductive materials or household adhesives. Follow the manufacturer's repair guidance or consult the supplier.
Edge sealing may be required for some installations, particularly where moisture exposure is a concern. Use only compatible materials and the specified procedure. Incorrect sealing can trap moisture or interfere with electrical components.
Step 6: Connect the Smart Film to Its Power Supply
Electrical integration is a critical part of the installation process.
PDLC smart film generally operates through a compatible power supply or transformer that converts the incoming electrical supply to the output required by the film. The correct output voltage, frequency, power capacity, and connection method must be confirmed from the product specifications.
Typical system components may include:
PDLC smart film.
A compatible transformer or power supply.
Insulated connection cables.
A wall switch or remote-control receiver.
Optional smart-home control equipment.
The film's busbars and connection terminals must be connected according to the manufacturer's wiring diagram. Incorrect connections can prevent switching, cause uneven operation, or damage the product.
Electrical safety requirements:
Do not connect smart film directly to mains electricity unless the product documentation explicitly specifies an approved arrangement; conventional PDLC systems generally require a compatible transformer.
Have mains-side wiring and fixed electrical work completed by a suitably qualified electrician in accordance with local regulations.
Disconnect power before permitted inspection or connection work.
Keep transformers and connections within the specified environmental and ventilation conditions.
Never energise a wet, visibly damaged, or incorrectly connected installation.
If the wiring diagram is unclear or the required output specifications cannot be confirmed, stop and consult the manufacturer or a qualified installer.
Step 7: Test the Switching Function
Once the installation has been completed and checked, test the system according to the manufacturer's commissioning procedure.
Confirm that the film changes between its intended optical states, the control system responds correctly, and the transformer operates within its specified conditions.
Inspect for uneven switching, unusual sounds, overheating, visible electrical damage, or persistent defects. Do not repeatedly energise a system that appears faulty.
Some installations may show differences in haze, transparency, or switching uniformity due to the product design, lighting, glass condition, or viewing angle. Compare the result with the manufacturer's stated performance specifications.
Step 8: Allow the Installation to Set and Review the Finish
Follow the manufacturer's instructions regarding curing time, cleaning, and the first operating cycle. Wet-applied products may require additional drying time; dry-applied products may have different handling requirements.
Do not clean the film aggressively or disturb the edges before the specified period has elapsed.
Finally, record the installation date, product model, transformer specifications, and warranty information. These details can be useful for troubleshooting and future maintenance.
4. Common Smart Film Installation Mistakes to Avoid
Mistake 1: Dust Contamination
Dust trapped between the adhesive and glass can remain visible after installation.
Prevention: Clean the glass thoroughly, minimise airborne dust, and inspect the adhesive surface before application.
Mistake 2: Bubbles and Creases
Bubbles may result from incorrect application technique, trapped air, surface contamination, or incompatible installation methods.
Prevention: Follow the manufacturer's application procedure, use the recommended tools, and avoid excessive pressure or stretching.
Mistake 3: Incorrect Film Orientation
Some films have defined electrode positions and cable exits. Incorrect orientation can complicate wiring or make the installation incompatible with the planned cable route.
Prevention: Confirm orientation, dimensions, and electrical layout before removing the protective liner.
Mistake 4: Incorrect Transformer Selection
A transformer with an incompatible output can cause poor performance or damage the film.
Prevention: Verify the required voltage, frequency, power rating, and supported film area with the supplier. Do not choose a transformer based on appearance or connector compatibility alone.
Mistake 5: Moisture Entering Electrical Connections
Water or unsuitable installation solutions near busbars and exposed connections can cause electrical faults or premature failure.
Prevention: Use only the approved installation method and specified edge protection. Keep electrical components dry as directed.
Mistake 6: Poor Cable Management
Tight bends, tension, exposed connections, and unsuitable routing can compromise long-term reliability.
Prevention: Plan cable exits in advance, follow minimum bend requirements, and use an appropriate route that protects the wiring without damaging the film.
5. DIY Feasibility Checklist: When Should You Hire a Professional?
Before starting, assess the project against the following checklist.
DIY may be reasonable if:
The product is explicitly designed for self-adhesive retrofit installation.
The window is flat, accessible, and compatible with the film.
The glass dimensions are manageable.
The manufacturer supplies clear installation instructions.
You can maintain a clean installation environment.
You understand the limits of your electrical skills and can arrange qualified electrical work where required.
Professional installation is recommended if:
The project involves large, heavy, high, curved, or difficult-to-access glass panels.
The film requires lamination or specialist fabrication.
Multiple windows require coordinated cutting, wiring, and control integration.
Cable routing must be concealed inside walls or frames.
The installation includes complex smart-home controls.
The glass type, coating, or adhesive compatibility is uncertain.
You need documented commissioning, installation support, or a clearly defined workmanship warranty.
The decision should consider the cost of correcting a failed installation, not just the initial labour charge. An inexpensive DIY attempt can become more costly if the film must be replaced.
6. Smart Film Installation Cost: DIY vs. Professional
Smart film installation cost varies significantly by product and project. There is no single reliable price that applies to every residential window.
What Determines the Total Cost?
| Cost Component | DIY Installation | Professional Installation |
|---|---|---|
| Smart film | Required | Required |
| Transformer and controls | Required unless supplied in a package | Required unless supplied in a package |
| Installation tools and consumables | Purchased or already owned | Often included in the service |
| Installation labour | Mainly the homeowner's time | Charged by the installer |
| Electrical work | May require a qualified electrician | May be included or quoted separately |
| Cable concealment | Depends on the existing layout | May involve additional labour |
| Replacement for installation damage | Potential additional expense | Depends on the warranty and responsibility terms |
| Testing and commissioning | Performed according to the user's capability and instructions | May be included in the service |
How to Compare Installation Quotes
Request an itemised quote that identifies:
The smart film type, dimensions, and unit price.
The transformer, controller, and accessories included.
Film application labour and surface preparation.
Electrical installation and cable-routing costs.
Any frame modification or finishing work.
Testing, commissioning, warranty coverage, and exclusions.
Compare quotes using the same film specifications, glass area, control requirements, and scope of work. A lower initial quote may exclude electrical work, installation materials, or post-installation support.
For small, simple windows, DIY may reduce labour expenses. For larger or more complex projects, professional installation may offer better overall value by reducing installation risks and coordinating electrical integration.
7. Maintenance Tips to Maximise Smart Film Lifespan
Proper maintenance helps preserve appearance, adhesion, and switching performance.
Clean gently. Use a soft microfibre cloth and a cleaning solution approved by the manufacturer. Avoid abrasive pads, harsh chemicals, and excessive pressure.
Protect electrical components. Keep transformers, cable connections, and exposed electrical components within their specified environmental conditions. Do not allow cleaning liquid to enter connection areas.
Inspect the edges periodically. Look for lifting, peeling, discolouration, moisture ingress, or other visible changes. Address defects according to the manufacturer's instructions.
Avoid unauthorised modifications. Do not cut, drill, or trim installed smart film without confirming that the specific design permits it. Cutting through an electrode or active area can damage the film.
Check operation when necessary. If switching becomes uneven or the film stops responding, inspect the approved control settings and power supply arrangement. Have electrical faults assessed by a qualified professional.
Follow the warranty conditions. Installation methods, cleaning products, and electrical modifications may affect warranty coverage. Keep the original product documentation and installation records.
8. Frequently Asked Questions
Can I install smart film on existing home windows myself?
Yes, some self-adhesive PDLC smart films are designed for retrofit DIY installation. Success depends on product compatibility, surface preparation, accurate positioning, and correct installation procedures. Electrical connections may still require a qualified electrician. Always confirm that the product is intended for direct application to existing glass.
Is wet application better than dry application?
Neither method is universally better. The correct approach depends on the film's adhesive system and the manufacturer's instructions. Wet application can assist positioning for products designed for it, while dry application avoids introducing liquid beneath the film. Using the wrong method can cause adhesion or electrical problems.
How much does smart film installation cost?
The total cost depends on the film, window area, transformer, controls, labour, electrical work, and cable routing. DIY may reduce installation labour, but the homeowner should account for tools, mistakes, and any required professional electrical work. Request an itemised quote for an accurate project estimate.
Can smart film be connected to a smart-home system?
Some systems support integration with compatible smart switches, relays, or home-automation controllers. Compatibility must be verified against the film's transformer, control interface, and electrical requirements. A qualified installer can help ensure that the control system operates safely and correctly.
How long does residential smart film last?
Service life depends on product quality, installation, operating conditions, electrical compatibility, and maintenance. Ask the manufacturer for documented durability information, operating limits, and warranty terms rather than relying on a universal lifespan claim.
Can smart film be installed on double-glazed windows?
Potentially, but compatibility must be confirmed for the specific glass construction and film. Retrofitting film onto an existing pane is different from manufacturing laminated smart glass or modifying an insulated glass unit. Check the supplier's guidance before proceeding.
Conclusion
DIY smart film installation can be a practical option for homeowners working with compatible self-adhesive products and simple, accessible windows. However, accurate measuring, clean application, correct film orientation, and safe electrical integration are essential to achieving a reliable result.
Professional installation is generally the better choice for large glass panels, complex wiring, specialist film systems, and projects where installation support is important.
Before deciding, compare the complete smart film installation cost, confirm product compatibility, review warranty conditions, and establish who will handle electrical work and commissioning. A well-planned installation can help homeowners achieve switchable privacy while reducing the risk of avoidable defects and additional expenses.
Recommended linking:
The Ultimate Guide to Smart Film for Residential Windows
Recommend related products:
Smart Film For Residential Windows