Can You Apply PDLC Film to Existing Windows?
If you've ever wished your windows could offer instant privacy at the flick of a switch without replacing the entire glass, you're not alone. The good news is that this dream is not only achievable but also surprisingly accessible to handy homeowners. The answer to the question "Can you apply PDLC smart window film to existing windows?" is a resounding YES. This comprehensive DIY guide will walk you through everything you need to know to transform your ordinary windows into intelligent, switchable privacy surfaces.

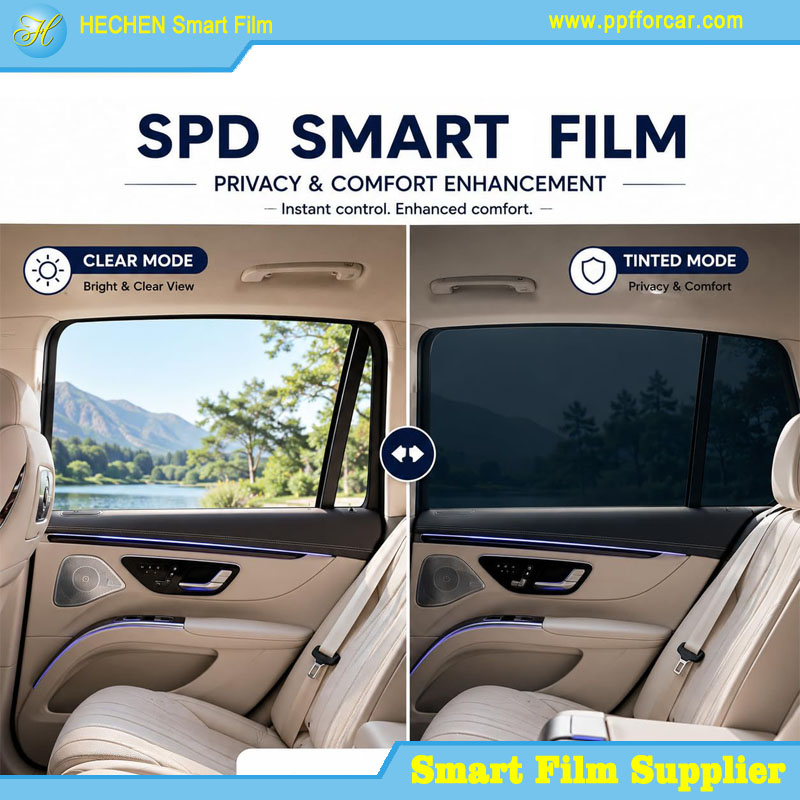
Understanding PDLC Smart Film Technology
Before diving into the installation process, it's helpful to understand what you're working with. PDLC stands for Polymer Dispersed Liquid Crystal. This thin, flexible film contains liquid crystal droplets dispersed within a polymer matrix, sandwiched between transparent conductive layers.
The magic happens when electricity is applied. When the power is off, the liquid crystals are randomly oriented, scattering light and giving the film a frosted, opaque appearance that provides complete privacy. When you flip a switch or activate a smart home command, an electric current aligns the crystals, allowing light to pass through and rendering the film transparent. This transformation happens almost instantaneously—typically within milliseconds.
What makes this technology perfect for retrofitting is the self-adhesive version of the film. Unlike integrated smart glass that requires complete window replacement, self-adhesive PDLC film comes with a pressure-sensitive backing that allows it to stick directly to your existing glass surfaces.
Is Your Window Suitable for Smart Film Application?
Not every window is an ideal candidate for DIY smart film installation. Before purchasing materials, evaluate your windows against these criteria:
Surface Quality Assessment
Smart film is unforgiving when it comes to surface imperfections. Deep scratches in existing glass can trap air bubbles during application, creating permanent visual defects that cannot be corrected. The glass must be in good condition—free from chips, cracks, and significant scratching.
Glass Type Compatibility
Most standard float glass, tempered glass, and insulated glass units work well with smart film. However, heavily textured or patterned glass cannot be retrofitted successfully, as the film requires a smooth, flat surface for proper adhesion and optical performance.
Location Considerations
Standard self-adhesive smart film is designed for interior use only. It cannot be exposed to weather, high humidity, or direct water contact. This means it is suitable for interior windows, glass partitions, and the interior face of exterior windows, but not for outdoor applications or steamy bathroom environments where moisture is constant.
For wet areas like bathrooms or external facades, you would need to consider laminated smart glass units instead of self-adhesive film.
Frame and Wiring Access
Since smart film is an electrical product, it requires connection to a power source via a transformer. Assess your window frames: aluminum and uPVC frames are generally easier to drill for cable routing than steel or hardwood. You'll need a route to run a cable from the window frame to a power outlet within a reasonable distance.
Tools and Materials You'll Need
Before starting your DIY project, gather the following supplies:
For the film installation:
Self-adhesive PDLC smart film cut to your window dimensions
99% isopropyl alcohol (industrial alcohol) for cleaning
Lint-free cloths
Sharp utility knife with fresh blades
Measuring tape
Squeegee (plastic film applicator tool)
Ruler or straight edge
For the electrical connection:
Compatible power supply unit (transformer)
Electrical wires (appropriate gauge)
Soldering iron and solder
Electrical tape
Wire strippers
Neutral-cure, non-corrosive silicone sealant
Step-by-Step DIY Installation Guide
Step 1: Measure Carefully and Order Your Film
Measure the width and height of your window glass accurately. Measure twice to ensure precision. When ordering film, it's wise to add a small margin (about 1-2 cm) to allow for trimming. Self-adhesive PDLC film can be cut to size with scissors or a utility knife, making it adaptable to various window dimensions.
Step 2: Prepare Your Work Environment
For non-professionals, it is recommended to have two people handle the installation—one person to lower the film into position and another to manage bubble removal. For film widths greater than 1.2 meters, having 2-3 people working together is advisable.
Ensure your work environment is as clean and dust-free as possible. Dust particles trapped under the film will create visible bubbles and defects. Clear a workspace in front of the glass equal to the height of the window itself to allow easy movement.
Step 3: Clean the Glass Thoroughly
This step is absolutely critical. Smart film installation uses a dry process—never use water. Instead, clean the glass surface with 99% isopropyl alcohol and a lint-free cloth. Avoid using any chemical cleaners, as they may leave residues that interfere with adhesion or even corrode the film over time.
The glass must be 100% dry before proceeding. Any moisture, silicone residue, or stubborn grime will prevent proper adhesion and may cause premature failure.
Step 4: Cut the Film to Size
Lay the film on a clean, flat surface with the protective layer facing up. Using your measurements and a straight edge, mark the cutting lines. Cut the PDLC smart window film with a sharp utility knife or scissors, ensuring straight, clean edges.
Important: Do not remove the protective layer from the adhesive side until you are ready to install. Keep the protective layer on the non-adhesive side intact until the installation is finished to prevent scratching.
Step 5: Position and Apply the Film
Peel back a small corner of the protective backing from the adhesive side. Carefully align this corner with the top edge of your window, using alignment tape if needed to mark the position.
Slowly begin to apply the film to the glass, working from the top down. As you peel away more of the backing, use a squeegee to smooth the film onto the glass surface. Start from the center and work outward toward the edges in overlapping strokes to push out air bubbles.
Take your time—rushing leads to misalignment and trapped bubbles. If you encounter stubborn air bubbles, you can make a tiny puncture at the edge of the bubble with a needle and use the squeegee to push the air out.
Step 6: Trim Excess Film
Once the film is fully applied and all bubbles are removed, use a sharp utility knife to trim any excess film precisely along the edges of the glass. A straight edge or ruler helps guide your cuts for clean results.
Step 7: Connect the Electrical Components
This step requires basic electrical knowledge and careful attention. Locate the electrodes on the film—typically conductive copper strips (busbars) along one edge. These are where the wires connect to the PDLC layer.
Solder the wires to the electrodes following the manufacturer's instructions. Use the appropriate gauge wire and ensure connections are secure. Once soldered, insulate the connections with electrical tape to prevent short circuits.
Connect the other end of the wires to the power supply unit, then connect the power supply to your electrical system. If you're uncomfortable with electrical work, consider having this part done by a qualified electrician.
Step 8: Conceal and Protect Connections
For a professional finish, the busbar and wires should be hidden. Ideally, the wires should exit the busbar and immediately enter the window frame, running inside the profile to the transformer. If drilling the frame is impossible, ultra-thin adhesive trunking can hide cables running down the frame.
Seal all edges and busbars with neutral-cure, non-corrosive silicone sealant specified for use with PDLC film. Never use standard acid-cure silicone, as it releases acetic acid that attacks the PDLC layer, causing the liquid crystals to fail—resulting in "browning" or permanent transparency at the edges.
Step 9: Test Your Installation
Turn on the power to verify the film switches to transparent. Turn it off to confirm it returns to opaque. The transition should be instantaneous and uniform across the entire surface.
Important Considerations and Precautions
The Critical 4-Hour Rule
PDLC technology requires a maintenance cycle to prevent "memory effect"—where crystals lose their ability to scatter light properly. The film must be switched off (opaque) for at least 4 hours every 24 hours. It is not designed to be left transparent indefinitely. Consider installing a timer to automate this cycle.
Handling the Film with Care
Never fold, bend, or curve smart film sharply. The film must be kept flat and straight to prevent delamination of the layers. Handle edges carefully during installation.
Patience with Air Bubbles
Even with careful technique, some small bubbles may appear. These often disappear within a few days as the film settles and any trapped air dissipates through the adhesive. However, bubbles caused by dust or poor cleaning are permanent.
Temperature Considerations
Self-adhesive PDLC film typically operates effectively between -20°C and 70°C. Avoid installation in extreme temperatures, as this can affect adhesion and film handling.
Troubleshooting Common Issues
| Problem | Likely Cause | Solution |
|---|---|---|
| Film won't stick properly | Surface not thoroughly cleaned | Remove film, re-clean glass with alcohol, reapply with fresh film |
| Large air bubbles | Rapid application or dust trapped | Small bubbles may settle; large ones require lifting film and reapplying |
| Uneven switching or dead spots | Poor electrical connection or damaged busbar | Check wiring connections; film cannot be repaired if damaged |
| Film doesn't turn fully transparent | Insufficient voltage or power supply issue | Verify power supply output matches film requirements |
| Browning at edges after time | Acid-cure silicone used on edges | Prevention only—once damaged, film must be replaced |
Conclusion
Applying PDLC smart window film to existing windows is not only possible but represents one of the most cost-effective ways to bring intelligent privacy control into your home. With careful preparation, attention to detail, and patience during installation, you can transform ordinary glass into a dynamic surface that responds instantly to your needs.
The benefits extend beyond privacy—you'll also gain UV protection that blocks up to 99% of harmful rays, potential energy savings through heat reflection, and the modern aesthetic of switchable glass without the cost of full window replacement.
For smaller windows and straightforward installations, a confident DIYer can achieve excellent results. However, for large windows, complex framing situations, or if you're uncomfortable with electrical work, professional installation remains a valuable option that ensures optimal performance and preserves warranty coverage.
Whichever path you choose, the ability to command your windows—clear for views and light, frosted for privacy—adds a dimension of flexibility and sophistication to your living space that traditional window treatments simply cannot match.
For more about Can You Apply PDLC Film to Existing Windows? Everything you need to know, you can pay a visit to https://www.ppfforcar.com/product/PDLC-Smart-Film/ for more info.