Transform Your Room in Seconds: A Guide to Installing Switchable Privacy Film
Imagine a world where your windows respond instantly to your command—clear and bright when you want an unobstructed view, frosted and private the moment you need seclusion. This isn't science fiction; it's the reality offered by switchable privacy film, a technology that is transforming how we think about glass in our homes and offices. The best part? With careful preparation and attention to detail, you can achieve this transformation yourself. This guide will walk you through everything you need to know to install switchable privacy film and turn any ordinary glass surface into a dynamic, intelligent part of your living space.

Understanding the Magic: How Switchable Film Works
Before diving into installation, it helps to understand what makes this film so remarkable. Switchable privacy film, also known as smart film or PDLC film, utilizes Polymer Dispersed Liquid Crystal technology. The film contains microscopic liquid crystal droplets suspended within a polymer matrix, all sandwiched between two transparent conductive layers.
The operation is elegantly simple: when no electricity is applied, the liquid crystals are randomly oriented, scattering light and giving the film a frosted, opaque appearance that provides complete privacy. When you flip a switch or activate a smart home command, an electric current aligns the crystals, allowing light to pass through and rendering the film transparent. This transformation happens almost instantaneously—typically within milliseconds—creating that "magic" effect that makes switchable film so captivating.
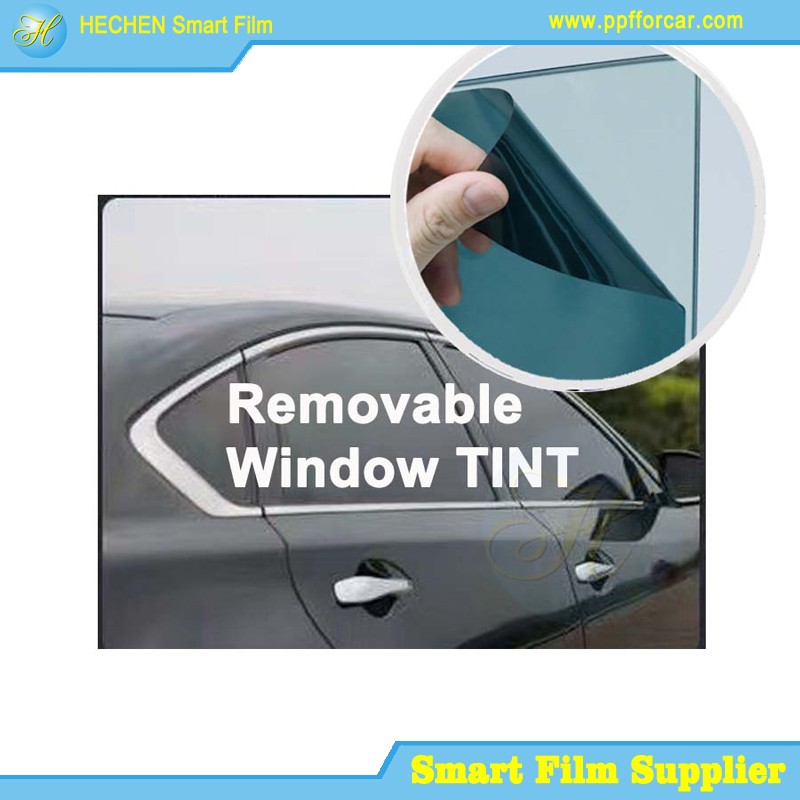
Beyond privacy, these films block up to 99% of harmful UV rays, protecting your furniture and flooring from fading, and can contribute to energy efficiency by reducing heat gain during summer months.
Preparation: The Foundation of Success
The key to a flawless installation lies not in the application itself, but in the preparation that comes before.
Assess Your Space and Gather Tools
Before purchasing film, carefully measure your window glass. Measure twice to ensure accuracy, and consider adding a small margin to allow for precise trimming after application.
Gather the following tools and materials:
For the film installation:
Self-adhesive PDLC smart film cut to your window dimensions
99% isopropyl alcohol for cleaning
Lint-free cloths
Sharp utility knife with fresh blades
Measuring tape
Squeegee (plastic film applicator tool)
Ruler or straight edge
Alignment tape
Nitrile gloves (lint-free)
For the electrical connection:
Compatible power supply unit
Electrical wires
Soldering iron and solder
Electrical tape
Wire strippers
Neutral-cure, non-corrosive silicone sealant
Non-conductive trim material (plastic, wood, or vinyl)
Create the Right Environment
For non-professionals, it is strongly recommended to have two people handle the installation—one person to lower the film into position and another to manage bubble removal. For film widths greater than 1.2 meters, having 2-3 people working together is advisable.
Your work environment must be as clean and dust-free as possible. Dust particles trapped under the film will create visible bubbles that cannot be fixed later. Clear a workspace in front of the glass equal to the height of the window itself to allow easy movement.
Understand the "Dry Process"
Unlike traditional window tinting that uses soapy water, switchable privacy film installation uses a dry process. Never use water. Instead, you will clean the glass with isopropyl alcohol and apply the film to completely dry glass. This is one of the most critical differences from conventional window film installation.
Step-by-Step Installation Guide
Step 1: Clean the Glass Thoroughly
This step is absolutely critical to success. Begin by using a window scraper or blade to remove any stubborn debris or paint specks from the glass surface. Clean the glass with a mild glass cleaner and lint-free cloth, then follow up by wiping the entire surface with 99% isopropyl alcohol and a fresh lint-free cloth.
Allow the alcohol to evaporate completely. The glass must be 100% dry before proceeding. Any moisture, silicone residue, or stubborn grime will prevent proper adhesion and may cause premature failure.
Step 2: Prepare the switchable privacy Film
Place the film on a clean, flat surface with the protective layer facing up. Identify the side with the adhesive—this is the side that will go against the glass. Keep the protective liner on the adhesive side until you are ready to install. Also keep the protective liner on the non-adhesive side intact until the installation is finished to prevent scratching.
If your film needs trimming, use a ruler or straight edge and a sharp utility knife to cut the film to your measured dimensions. Make sure cuts are straight and precise.
Step 3: Position the switchable privacy Film
Wipe the protective liner on the adhesive side to ensure it is free from dust. Peel back the first 2-3 inches of the protective liner from the edge that will be at the top of your window—this should be the edge where the electrical contacts are located.
Carefully align this exposed edge with the top of your window. Use alignment tape if needed to mark the correct position. Once aligned, run your finger along the electrical contact side while pressing firmly on the film. The exposed adhesive will hold the film in position. You can gently reposition if necessary at this stage.
Step 4: Apply the switchable privacy Film
Slowly begin to pull away the protective liner, allowing the film to adhere to the glass under its own weight. As you continue to peel away more backing, use a roller or squeegee to gently press the film onto the glass.
Work from the top down, and use the roller in a side-to-side motion to disperse and remove any air bubbles that may form. Start from the center and work outward toward the edges in overlapping strokes.
Take your time—rushing leads to misalignment and trapped bubbles. If you encounter an air bubble, you can carefully lift the film and let it re-adhere, or for small stubborn bubbles, make a tiny puncture at the edge with a needle and use the squeegee to push the air out.
Step 5: Complete the Application
Once the entire film is applied and all visible bubbles are removed, use a squeegee to work around the edges. The edges may appear to be lifting slightly—this is normal and will resolve once the remaining protective liner is removed.
Now you can remove the protective liner from the non-adhesive side of the film.
Using a sharp utility knife and a straight edge, trim any excess film precisely along the edges of the glass. This final trimming gives your installation a clean, professional appearance.
Step 6: Connect the Electrical Components
This step requires basic electrical knowledge and careful attention to safety. Locate the electrodes on the film—these are the conductive copper strips (busbars) along one edge.
Carefully solder the electrical wires to the mesh contacts on the busbar. Once soldered, insulate the connections with electrical tape to prevent short circuits.
Connect the other end of the wires to the power supply unit, following the manufacturer's instructions. If you are uncomfortable with electrical work, it is wise to consult a licensed electrician for this portion of the installation.
Step 7: Conceal and Protect Connections
For a professional finish and to ensure safety, the busbar and wires must be properly concealed and protected.
Run clear double-sided tape along the electrical contact side to hold your cables in place temporarily. Then, apply a bead of neutral-cure, non-corrosive silicone sealant along the electrical contact edge.
Critical Warning: Never use standard acid-cure silicone, as it releases acetic acid that attacks the PDLC layer, causing the liquid crystals to fail—resulting in "browning" or permanent transparency at the edges. Use only silicone specifically compatible with PDLC film.
Cover the connections with non-conductive trim material such as plastic, wood, or vinyl. If you must use metal trim, consult a licensed electrician as special grounding will be required.
The busbar and wires must never come into contact with any metal frame or conductive material. Leave a minimum gap between the film and any conductive window trim, covering this gap with non-conductive trim if full privacy coverage is desired.
Step 8: Test Your Installation
Once all trim is in place and silicone has cured, test the operation of your film. Turn on the power—the film should switch to transparent. Turn it off and confirm it returns to opaque. The transition should be instantaneous and uniform across the entire surface.
Check to ensure no wiring has come loose and that there is no exposed metal that could cause shock or fire hazard.
Important Considerations for Long-Term Success
The 4-Hour Maintenance Rule
PDLC technology requires a maintenance cycle to prevent "memory effect"—a condition where crystals lose their ability to scatter light properly. The film must be switched off (opaque) for at least 4 hours every 24 hours. It is not designed to be left transparent indefinitely. Consider installing a timer to automate this cycle automatically.
Moisture Protection
Seal all edges completely with neutral-cure silicone to prevent moisture infiltration. Failure to do so will void your warranty and can lead to premature film failure. Smart films are sensitive to moisture and are not recommended for outdoor applications or areas with constant high humidity.
Temperature Considerations
Self-adhesive PDLC film typically operates effectively between -20°C and 70°C. Avoid installation in extreme temperatures, as this can affect adhesion and film handling.
Handling with Care
Never fold, bend, or sharply curve smart film. The film must be kept flat and straight to prevent delamination of the layers. Handle edges carefully during installation.
Troubleshooting Common Issues
| Problem | Likely Cause | Solution |
|---|---|---|
| Film won't stick properly | Surface not thoroughly cleaned | Remove film, re-clean glass with alcohol, reapply with fresh film |
| Large air bubbles | Rapid application or dust trapped | Small bubbles may settle; large ones require lifting film and reapplying |
| Uneven switching or dead spots | Poor electrical connection or damaged busbar | Check wiring connections; film cannot be repaired if damaged |
| Film doesn't turn fully transparent | Insufficient voltage or power supply issue | Verify power supply output matches film requirements |
| Browning at edges after time | Acid-cure silicone used on edges | Prevention only—once damaged, film must be replaced |
Applications and Inspiration
The beauty of switchable privacy film lies in its versatility. In residential settings, it transforms bedrooms, bathrooms, and home offices into adaptable spaces that respond to your needs. In home theaters or media rooms, the film can double as a projection screen, eliminating the need for separate equipment.
In commercial environments, conference rooms gain instant privacy for meetings while maintaining an open feel when not in use. Glass partitions in offices can switch from collaborative transparency to focused privacy at the touch of a button.
Beyond windows, consider applying the film to interior glass doors, shower enclosures, or even glass tabletops for unique interactive surfaces. The only limit is your imagination.
Conclusion
Installing switchable privacy film on existing windows is not only possible but represents one of the most rewarding DIY projects you can undertake. With careful preparation, attention to detail, and patience during installation, you can transform ordinary glass into a dynamic surface that responds instantly to your needs.
The benefits extend far beyond the "wow factor"—you'll gain instant privacy control, protection from harmful UV rays, potential energy savings, and the modern aesthetic of switchable glass without the cost and disruption of full window replacement.
For smaller windows and straightforward installations, a confident DIYer can achieve excellent results. However, for large windows, complex framing situations, or if you're uncomfortable with electrical work, professional installation remains a valuable option that ensures optimal performance and safety.
Whichever path you choose, the ability to command your windows—clear for views and light, frosted for privacy—adds a dimension of flexibility and sophistication to your living space that traditional window treatments simply cannot match. In seconds, you can transform not just your windows, but the entire feel of your room.
For more about Switchable Smart Film: The Evolution of Adaptive Glass Technology in Modern Architecture and Design. Everything you need to know, you can pay a visit to https://www.ppfforcar.com/product/PDLC-Smart-Film/ for more info.